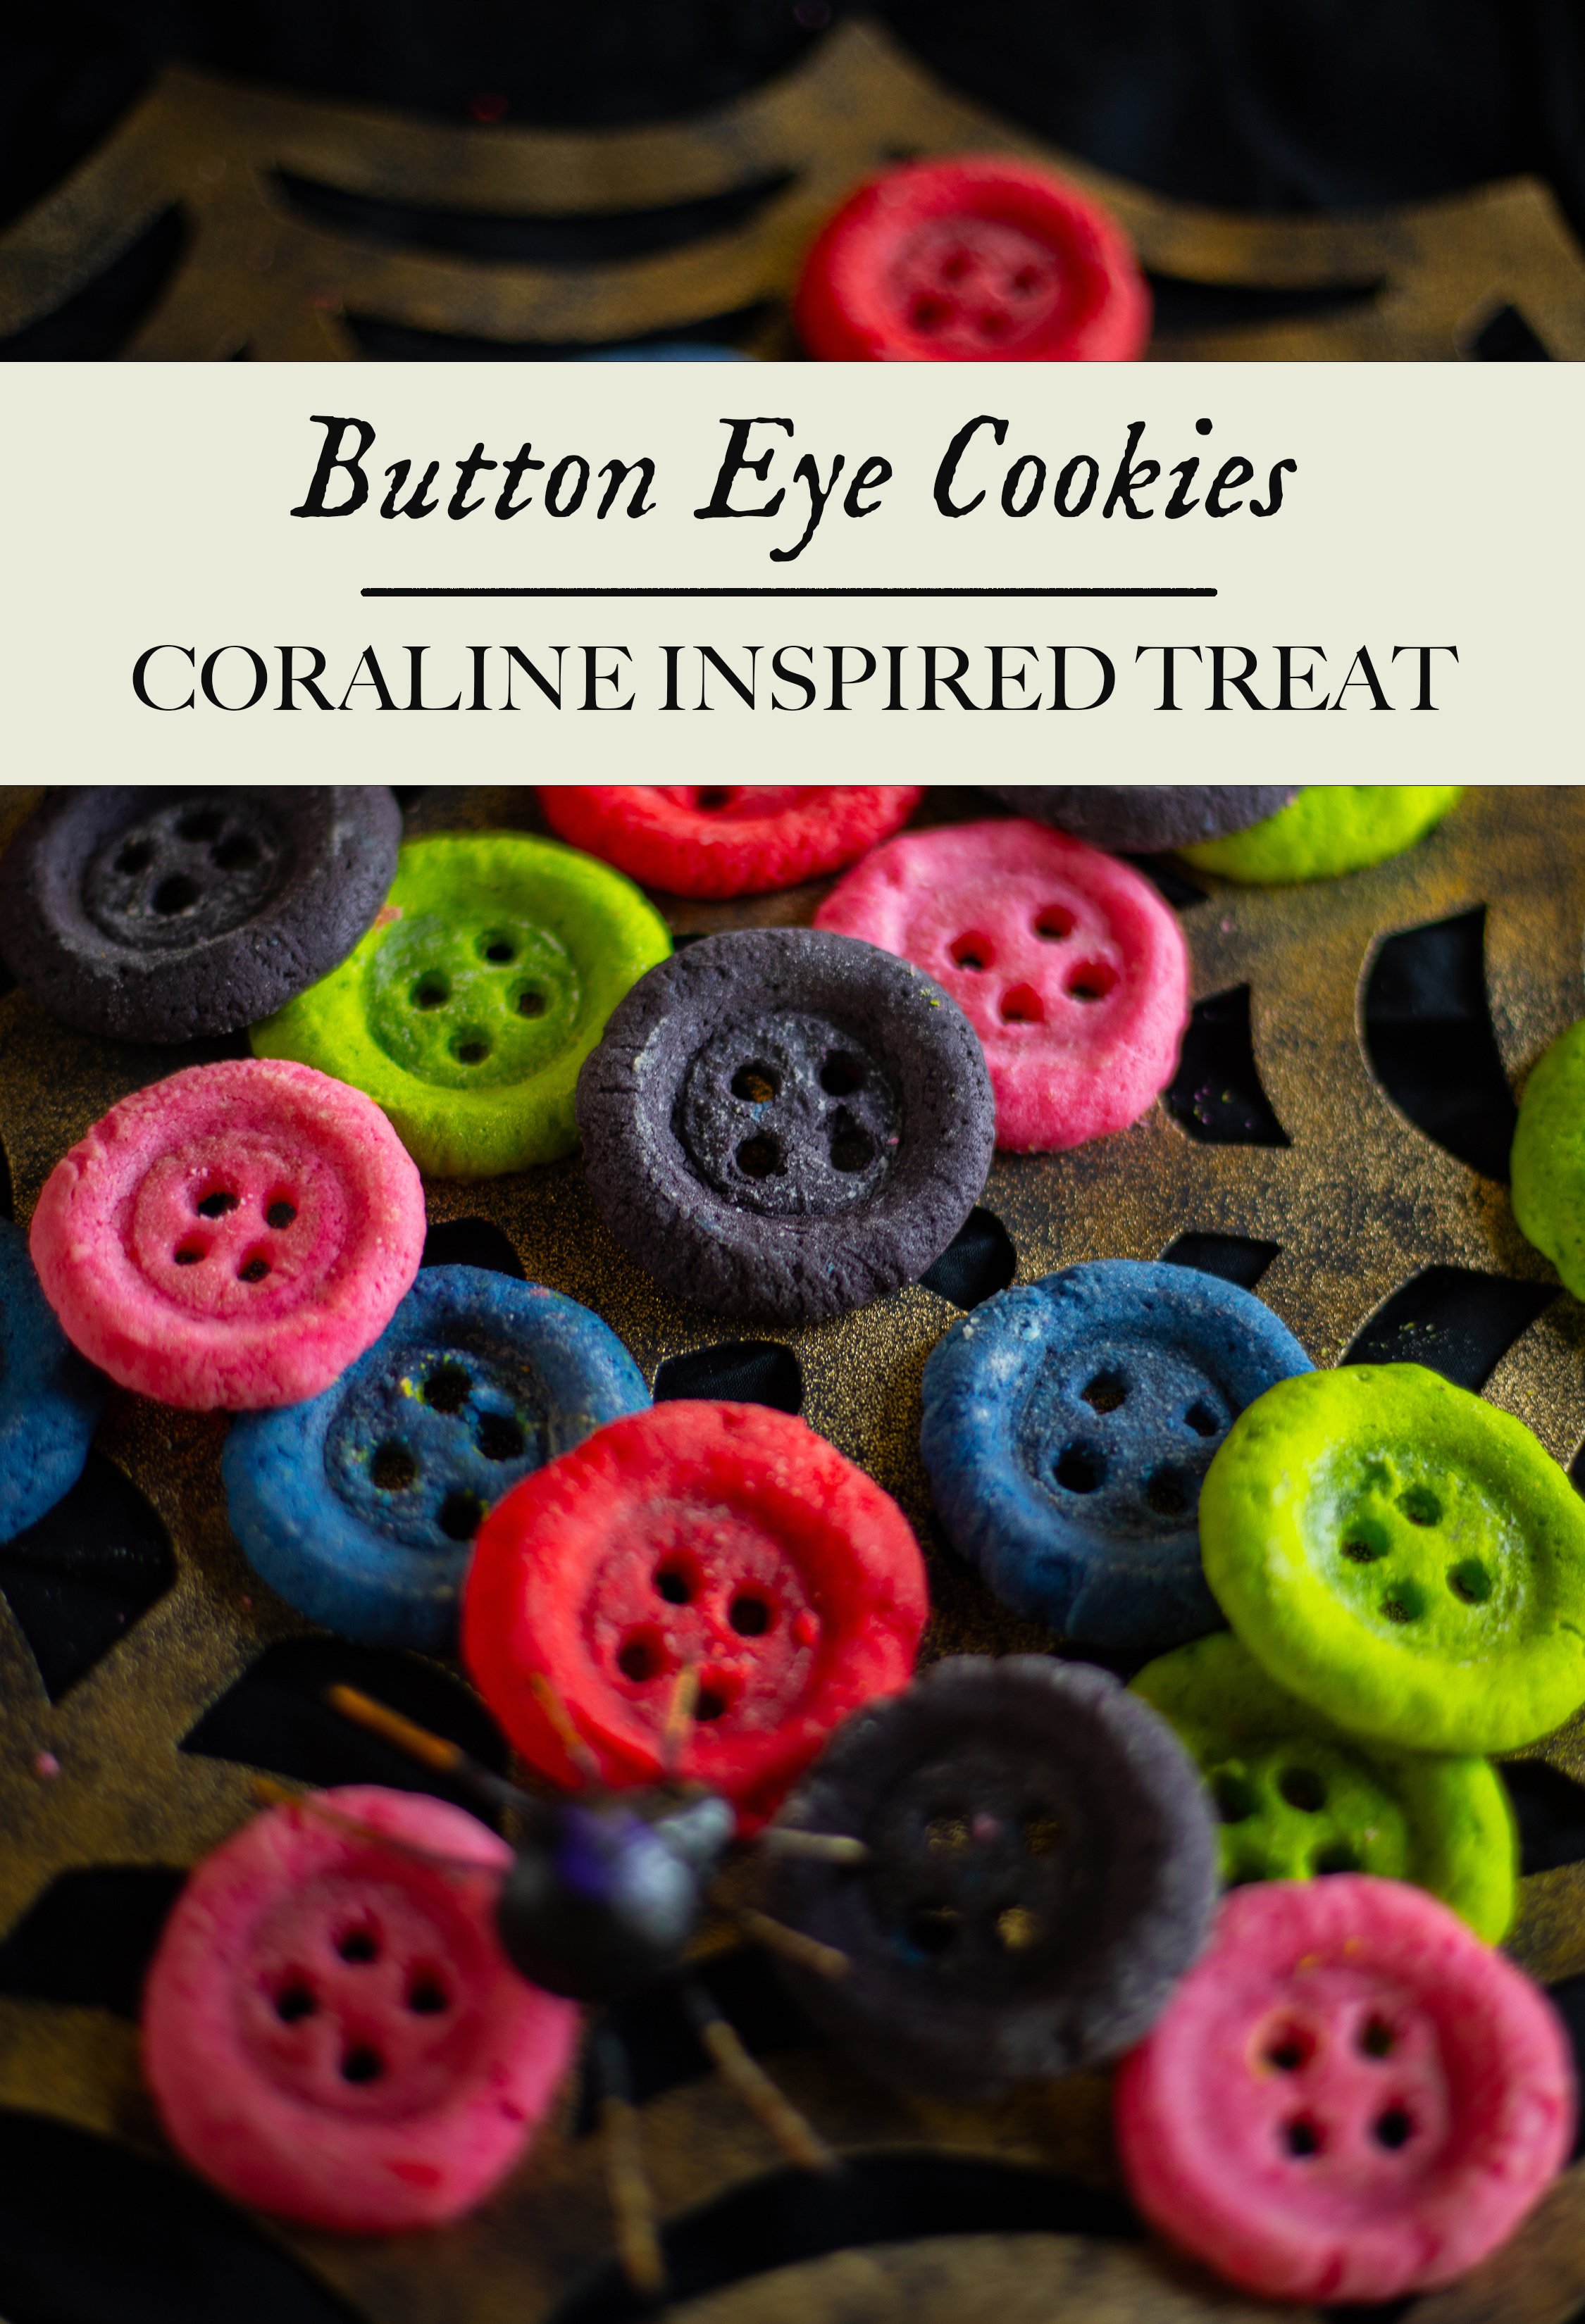
Button Eye Butter Cookies | Coraline
This post may contain affiliate links, please see our privacy policy for more information.
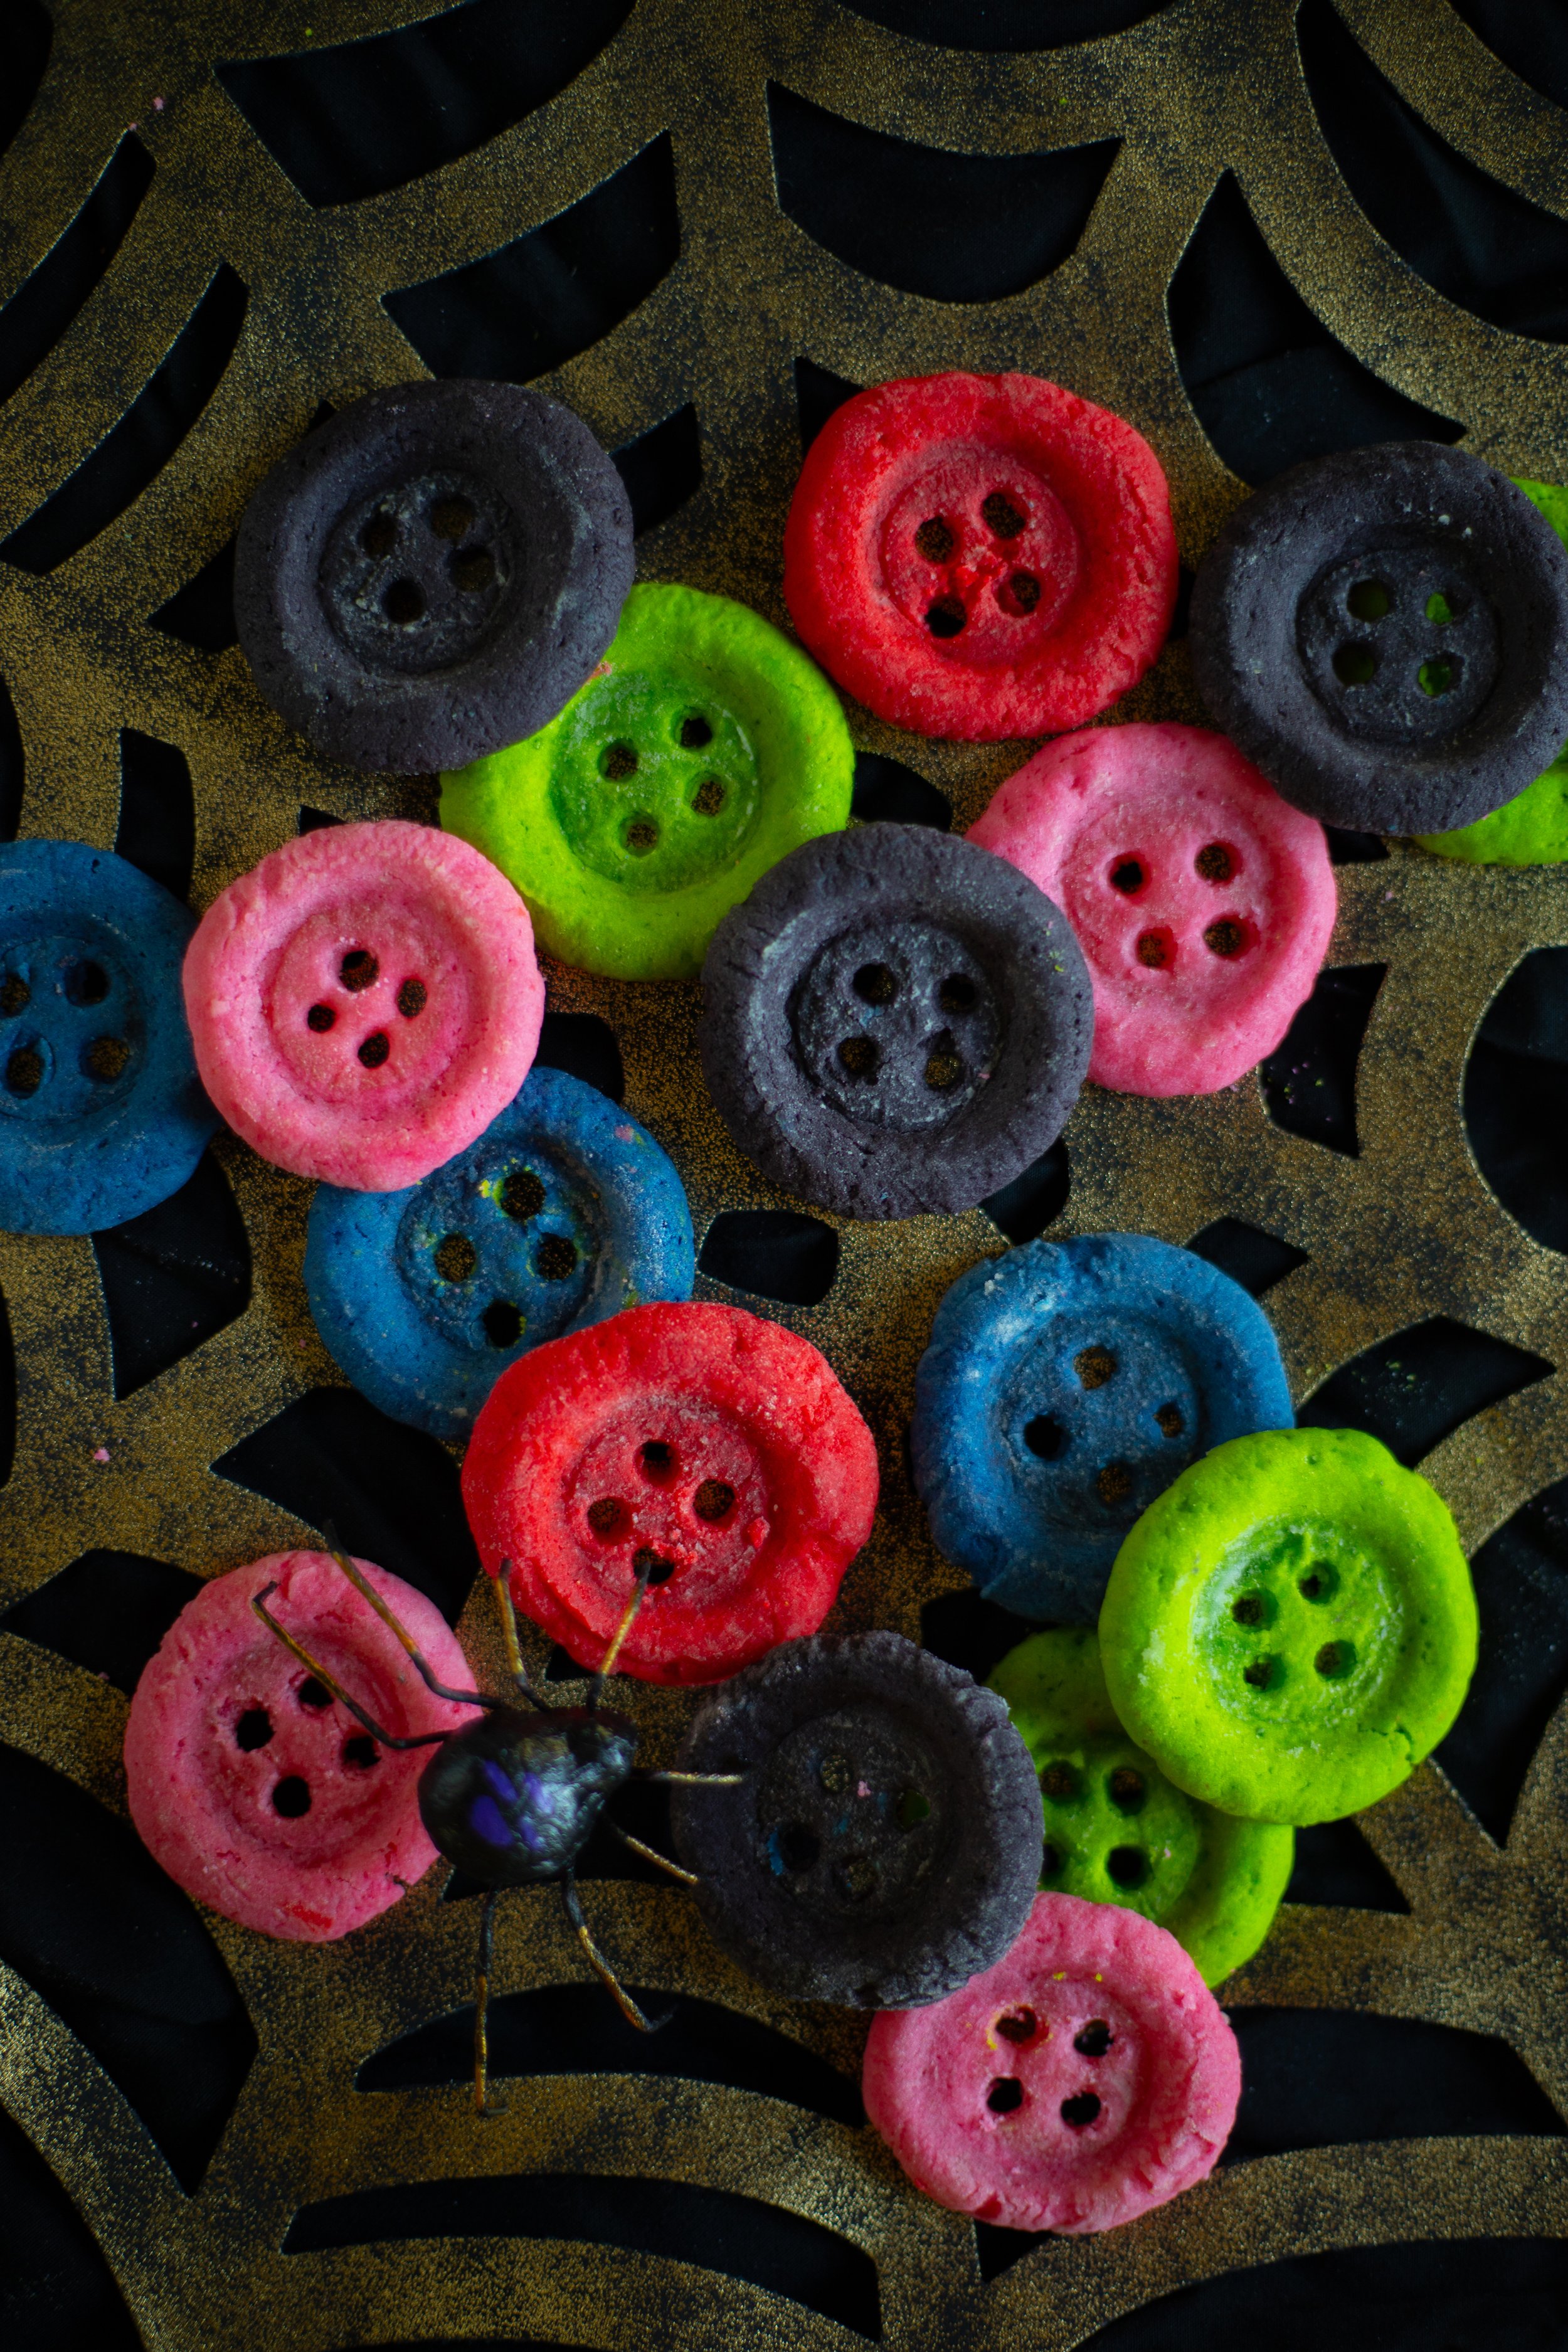
If you're a fan of Neil Gaiman's Coraline or planning a Halloween party with a spooky twist, these Button Eye Butter Cookies are the perfect addition to your table. Inspired by the eerie button eyes from the movie, these melt-in-your-mouth butter cookies are as delicious as they are eye-catching.
Why You’ll Love These Button Cookies:
These cookies are not only buttery and delicious but also a fun nod to the iconic button eyes in Coraline. Whether you're hosting a Halloween party, a Coraline-themed movie night, or just looking for a whimsical treat, these colorful cookies will be a hit. Plus, they’re easy to make and customizable with vibrant colors like black, vermilion, chartreuse, pink, and blue to match Coraline’s hair!
Gathering Ingredients:
To make these iconic Button Eye Butter Cookies from Coraline, you will need to gather a few key ingredients! These cookies are incredibly simple to make and melt-in-your-mouth.
Butter. I prefer to use salted butter, but you can use unsalted butter if that is what you prefer! If you choose to use unsalted butter, add about 1/4 teaspoon of salt to the recipe.
Sugar. This recipe uses granulated sugar.
Eggs. Be sure to use room temperature eggs!
Vanilla.
Flour. All-purpose flour works best for these cookies.
Gel Food Coloring. For bright colors that blend well, I highly suggest using gel food coloring over a water-based coloring. You do not have use as much color to get bright, deeply pigmented cookies.
How to Make Button Eye Butter Cookies:
Step One: Start by mixing the cookie dough. In the bowl of an electric standing mixer fitted with a paddle attachment, cream together the butter and sugar until light and fluffy, about 3 to 4 minutes. Add in the eggs, one at a time, beating until well incorporated, about 2 to 3 minutes more. Then, beat in the vanilla. Stir in the flour, bringing the dough together until it is cohesive and soft and pulls away slightly from the sides of the bowl, another 2 to 3 minutes.
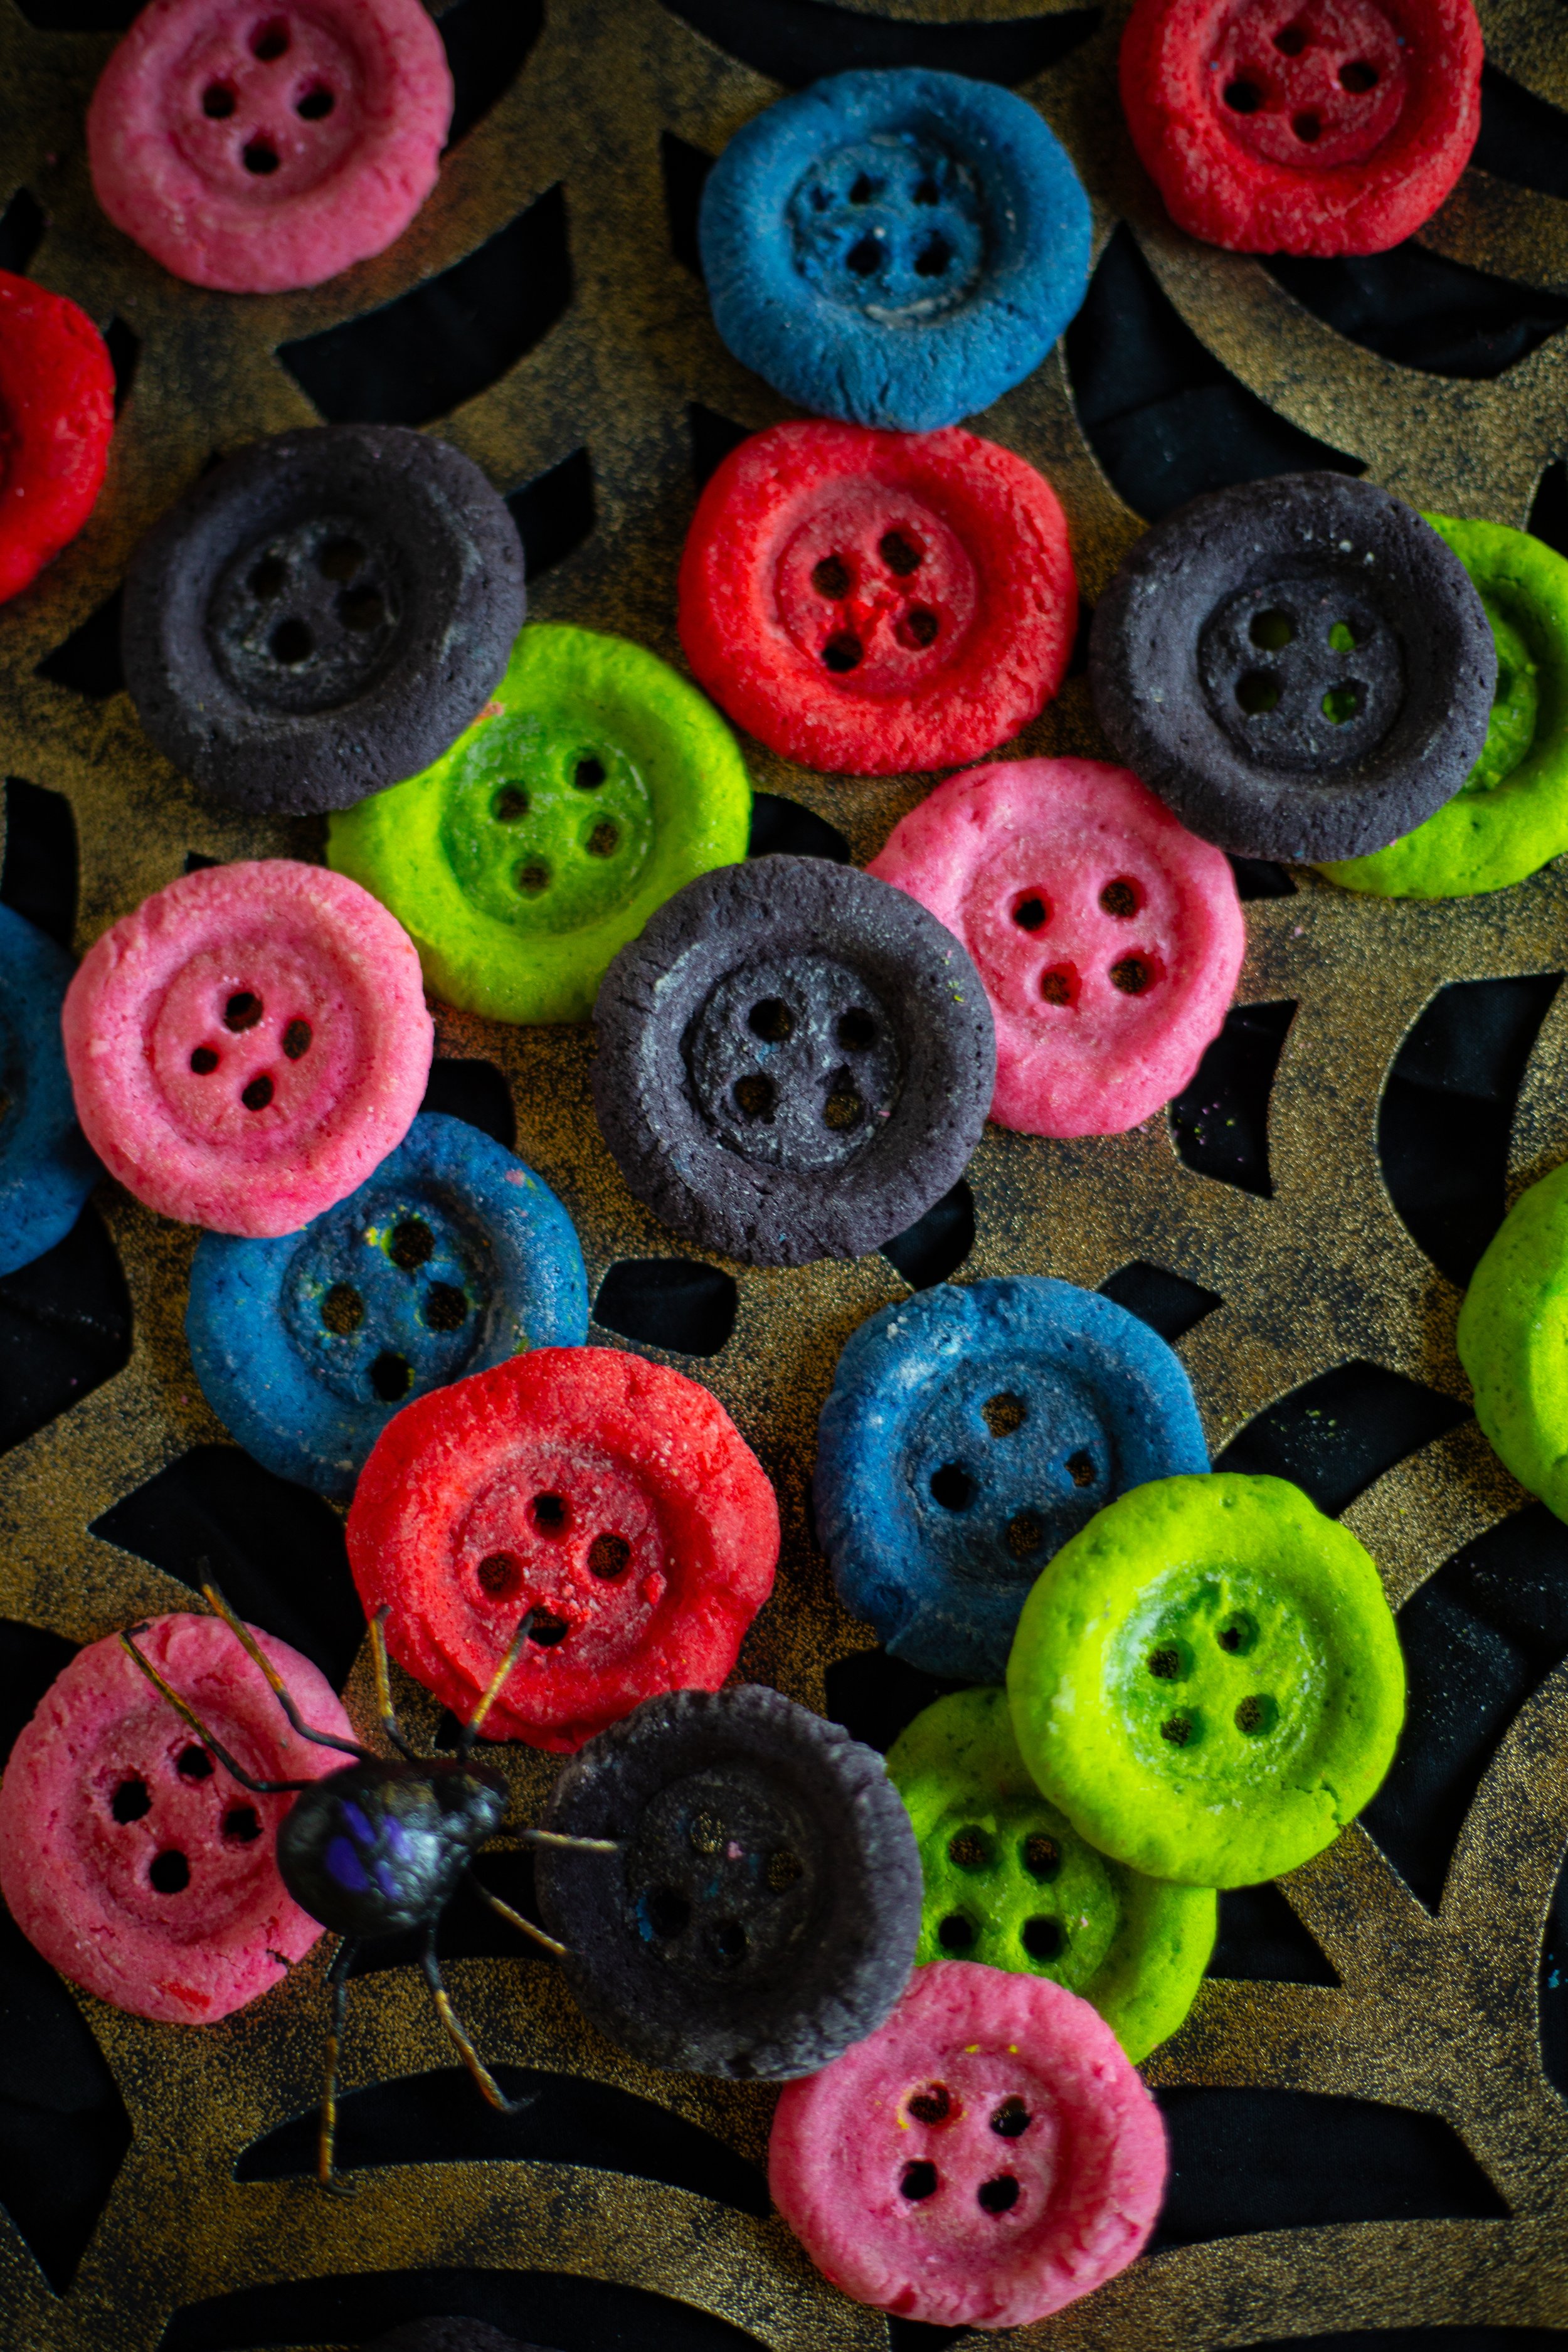
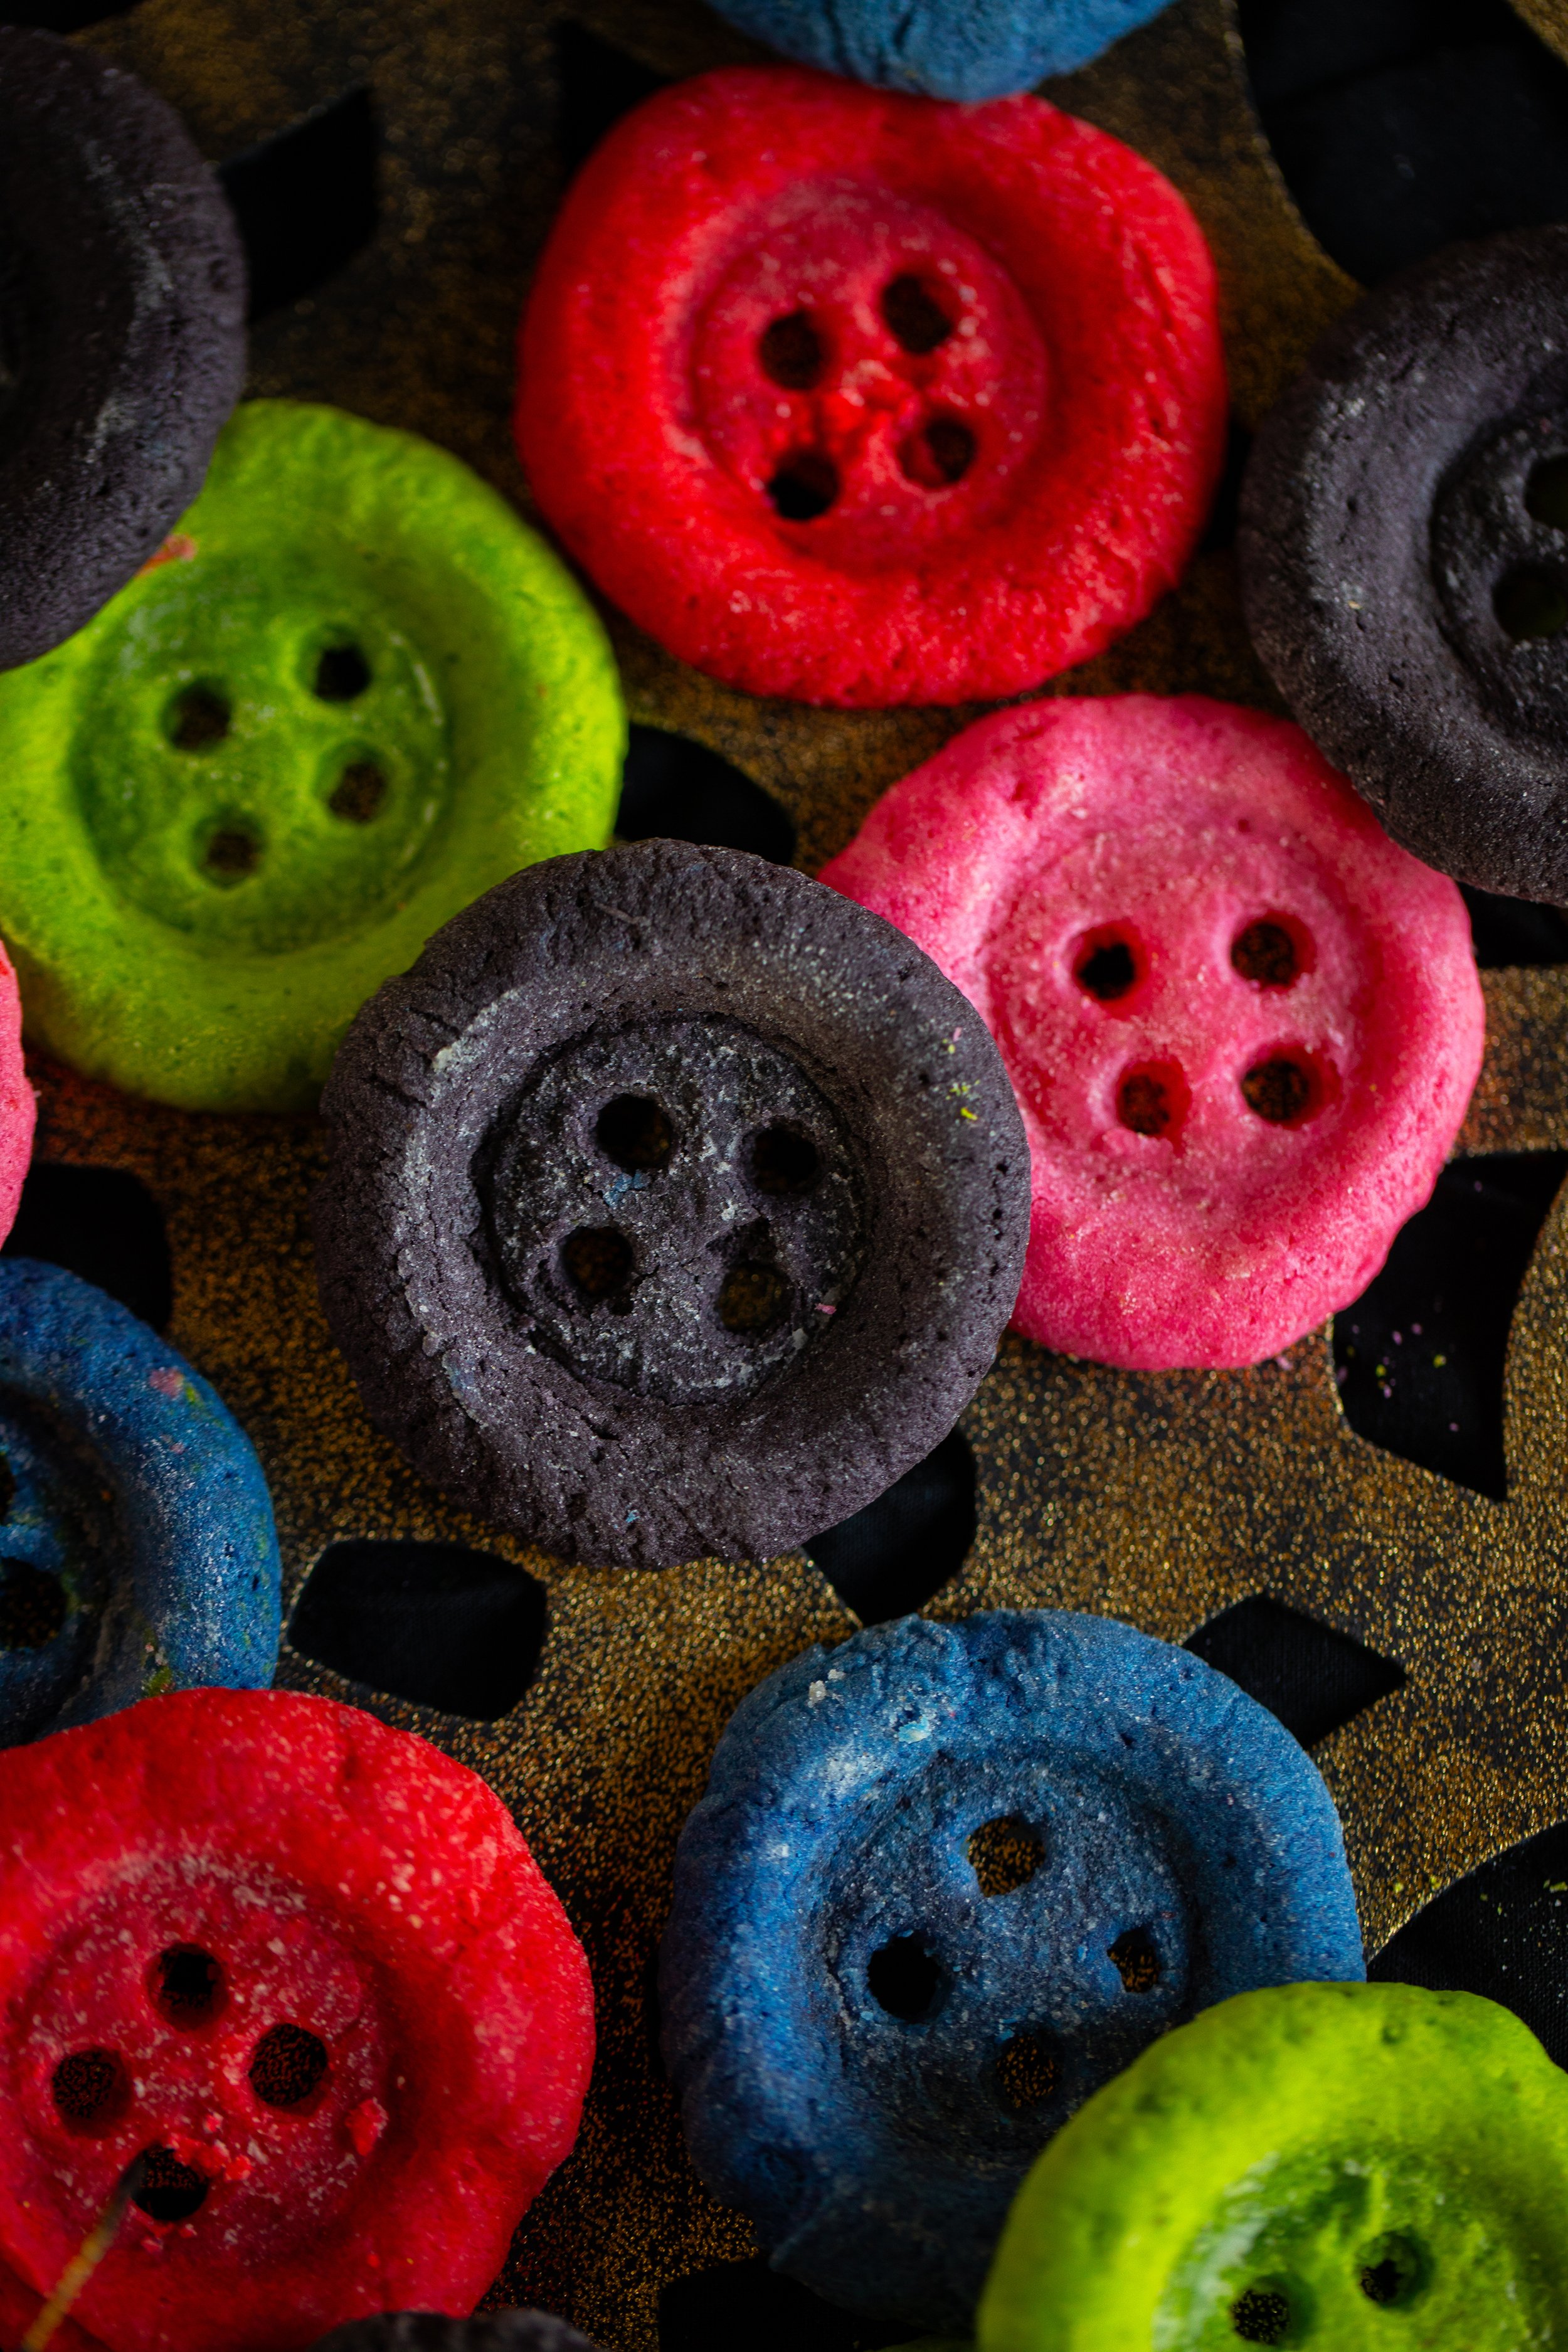
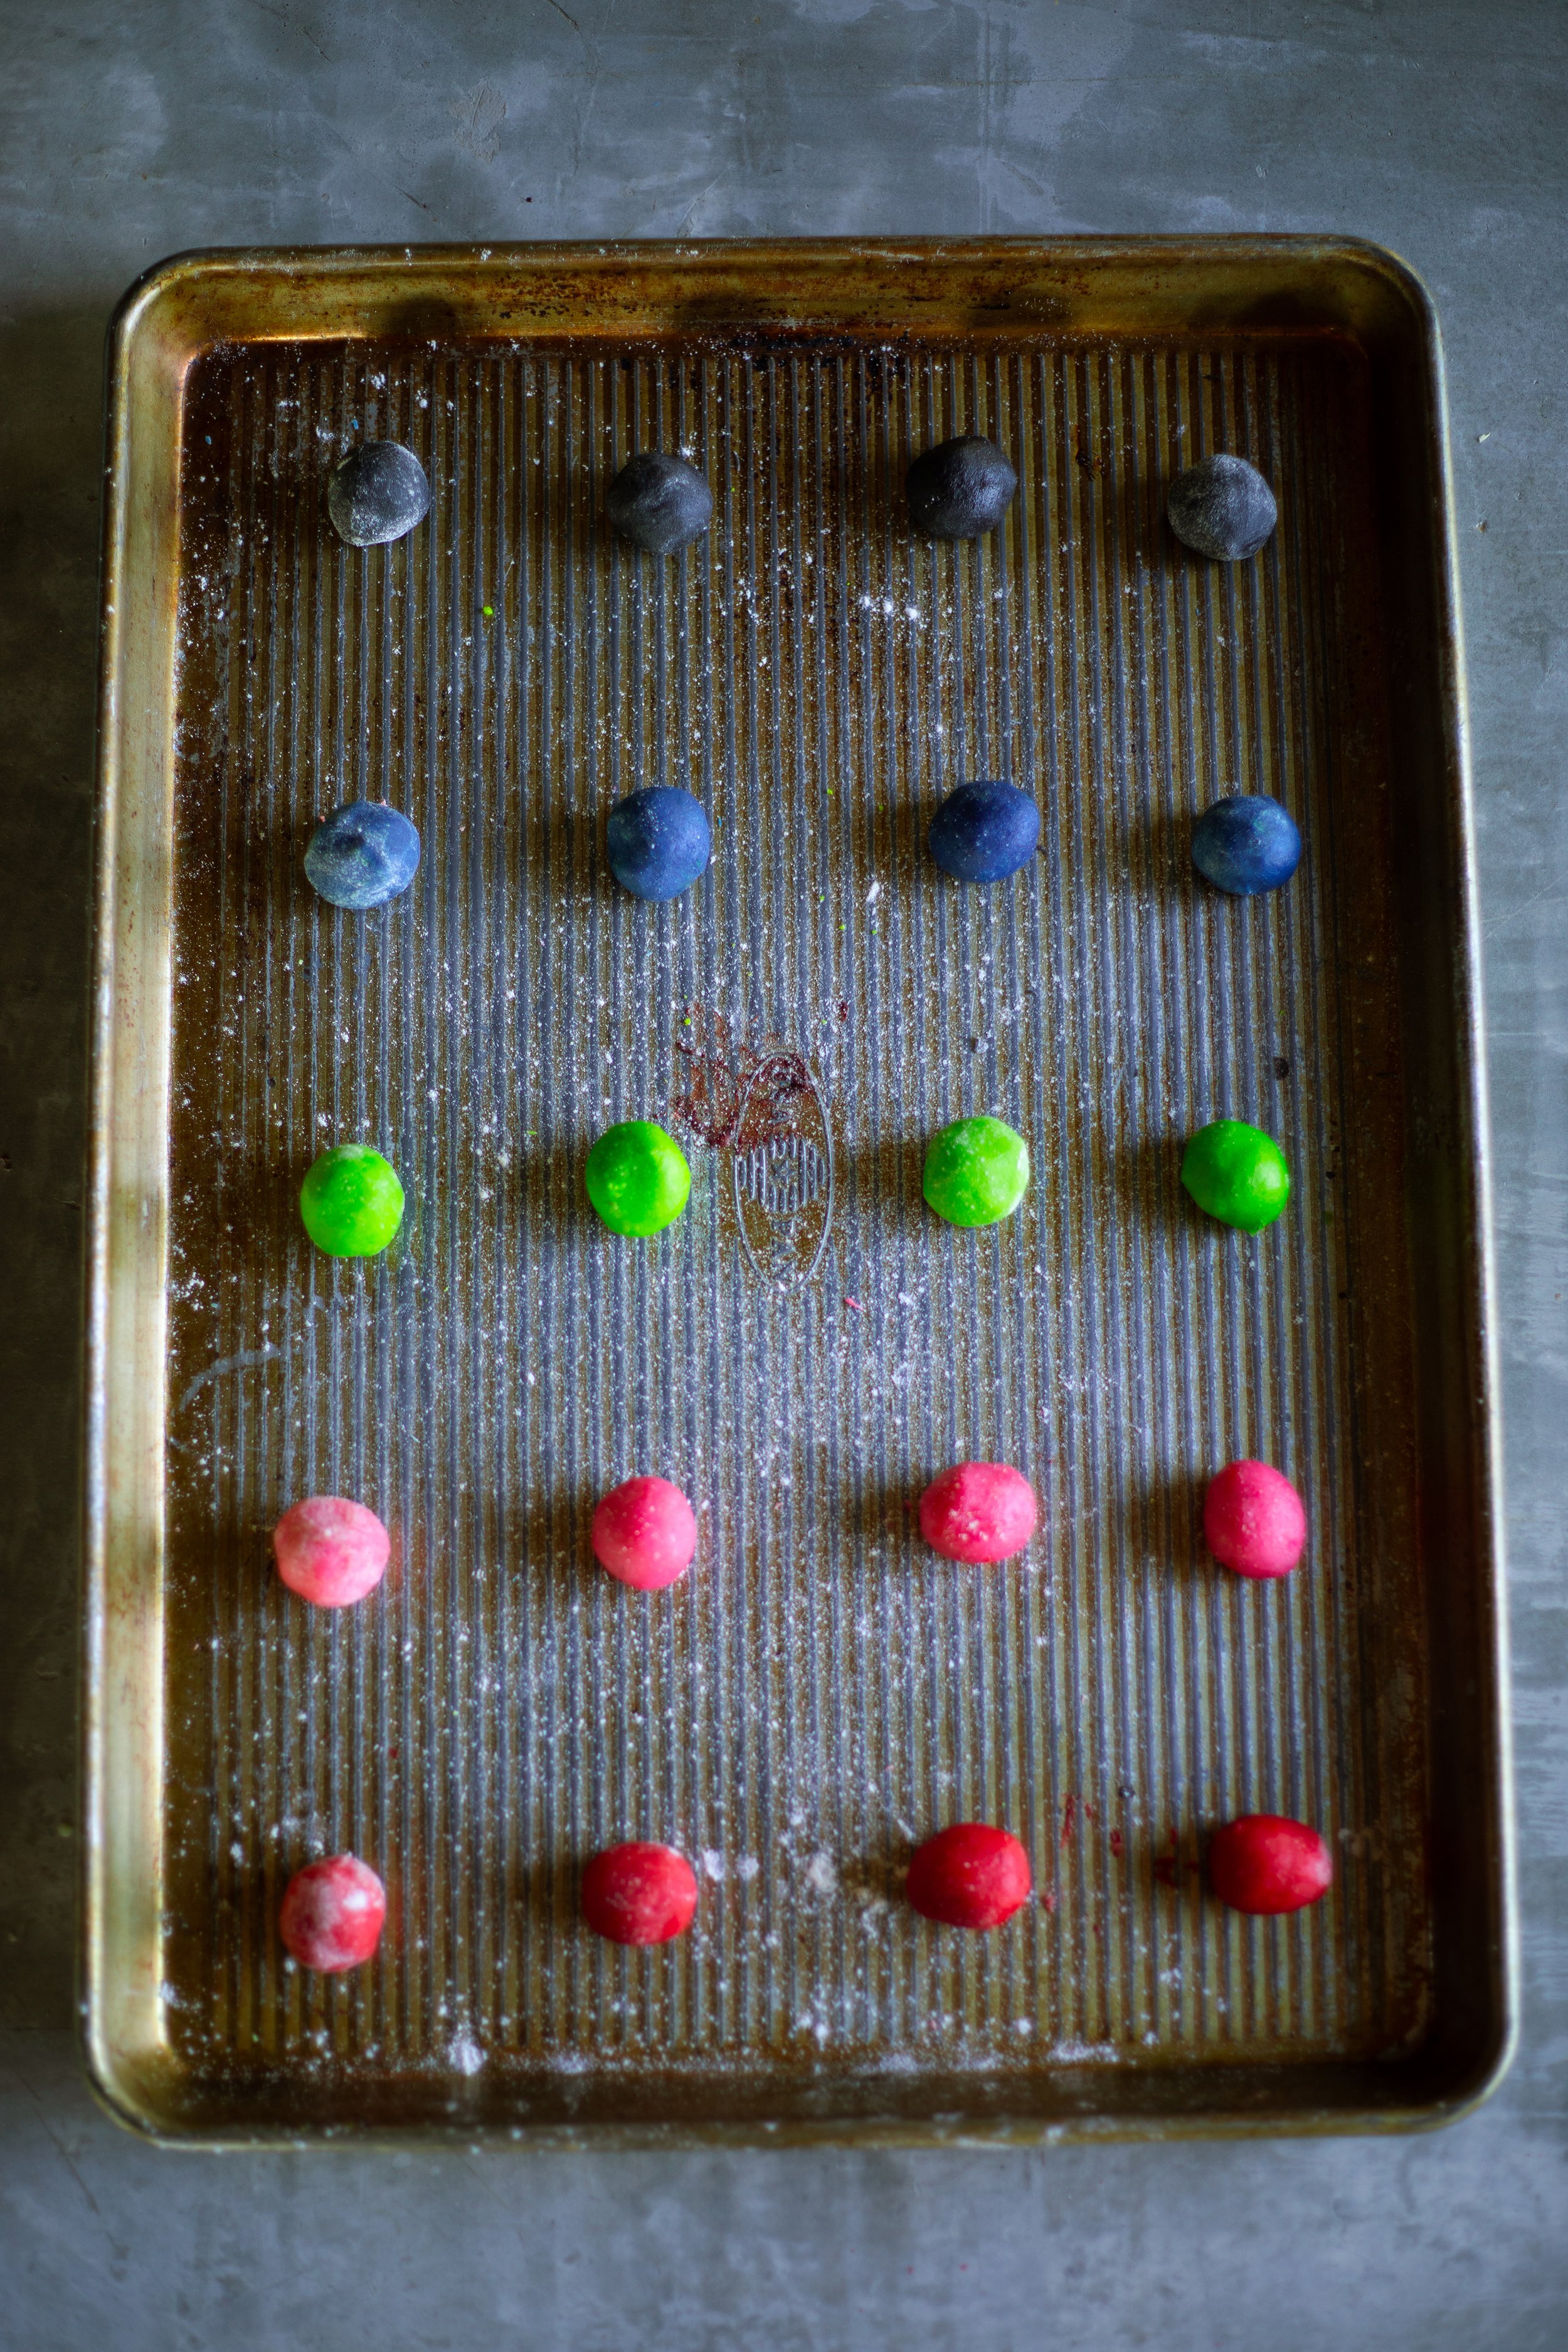
Step Two: Next, you will want to color the dough with food coloring to make the different buttons. Divide the dough into five equal sized portions. Place the portions of dough into small bowls. I found that it is easier to fold the food coloring into the dough with a silicone spatula than in the standing mixer, as you can really spread the coloring fully. Add a few drops of food coloring into each portion to create black, vermilion (red-orange), chartreuse (yellow-green), pink, and blue. My color formulas are in the notes below!**
Step Three: Cover the bowls with plastic wrap and refrigerate the dough for at least 1 hour and up to 48 hours before baking.
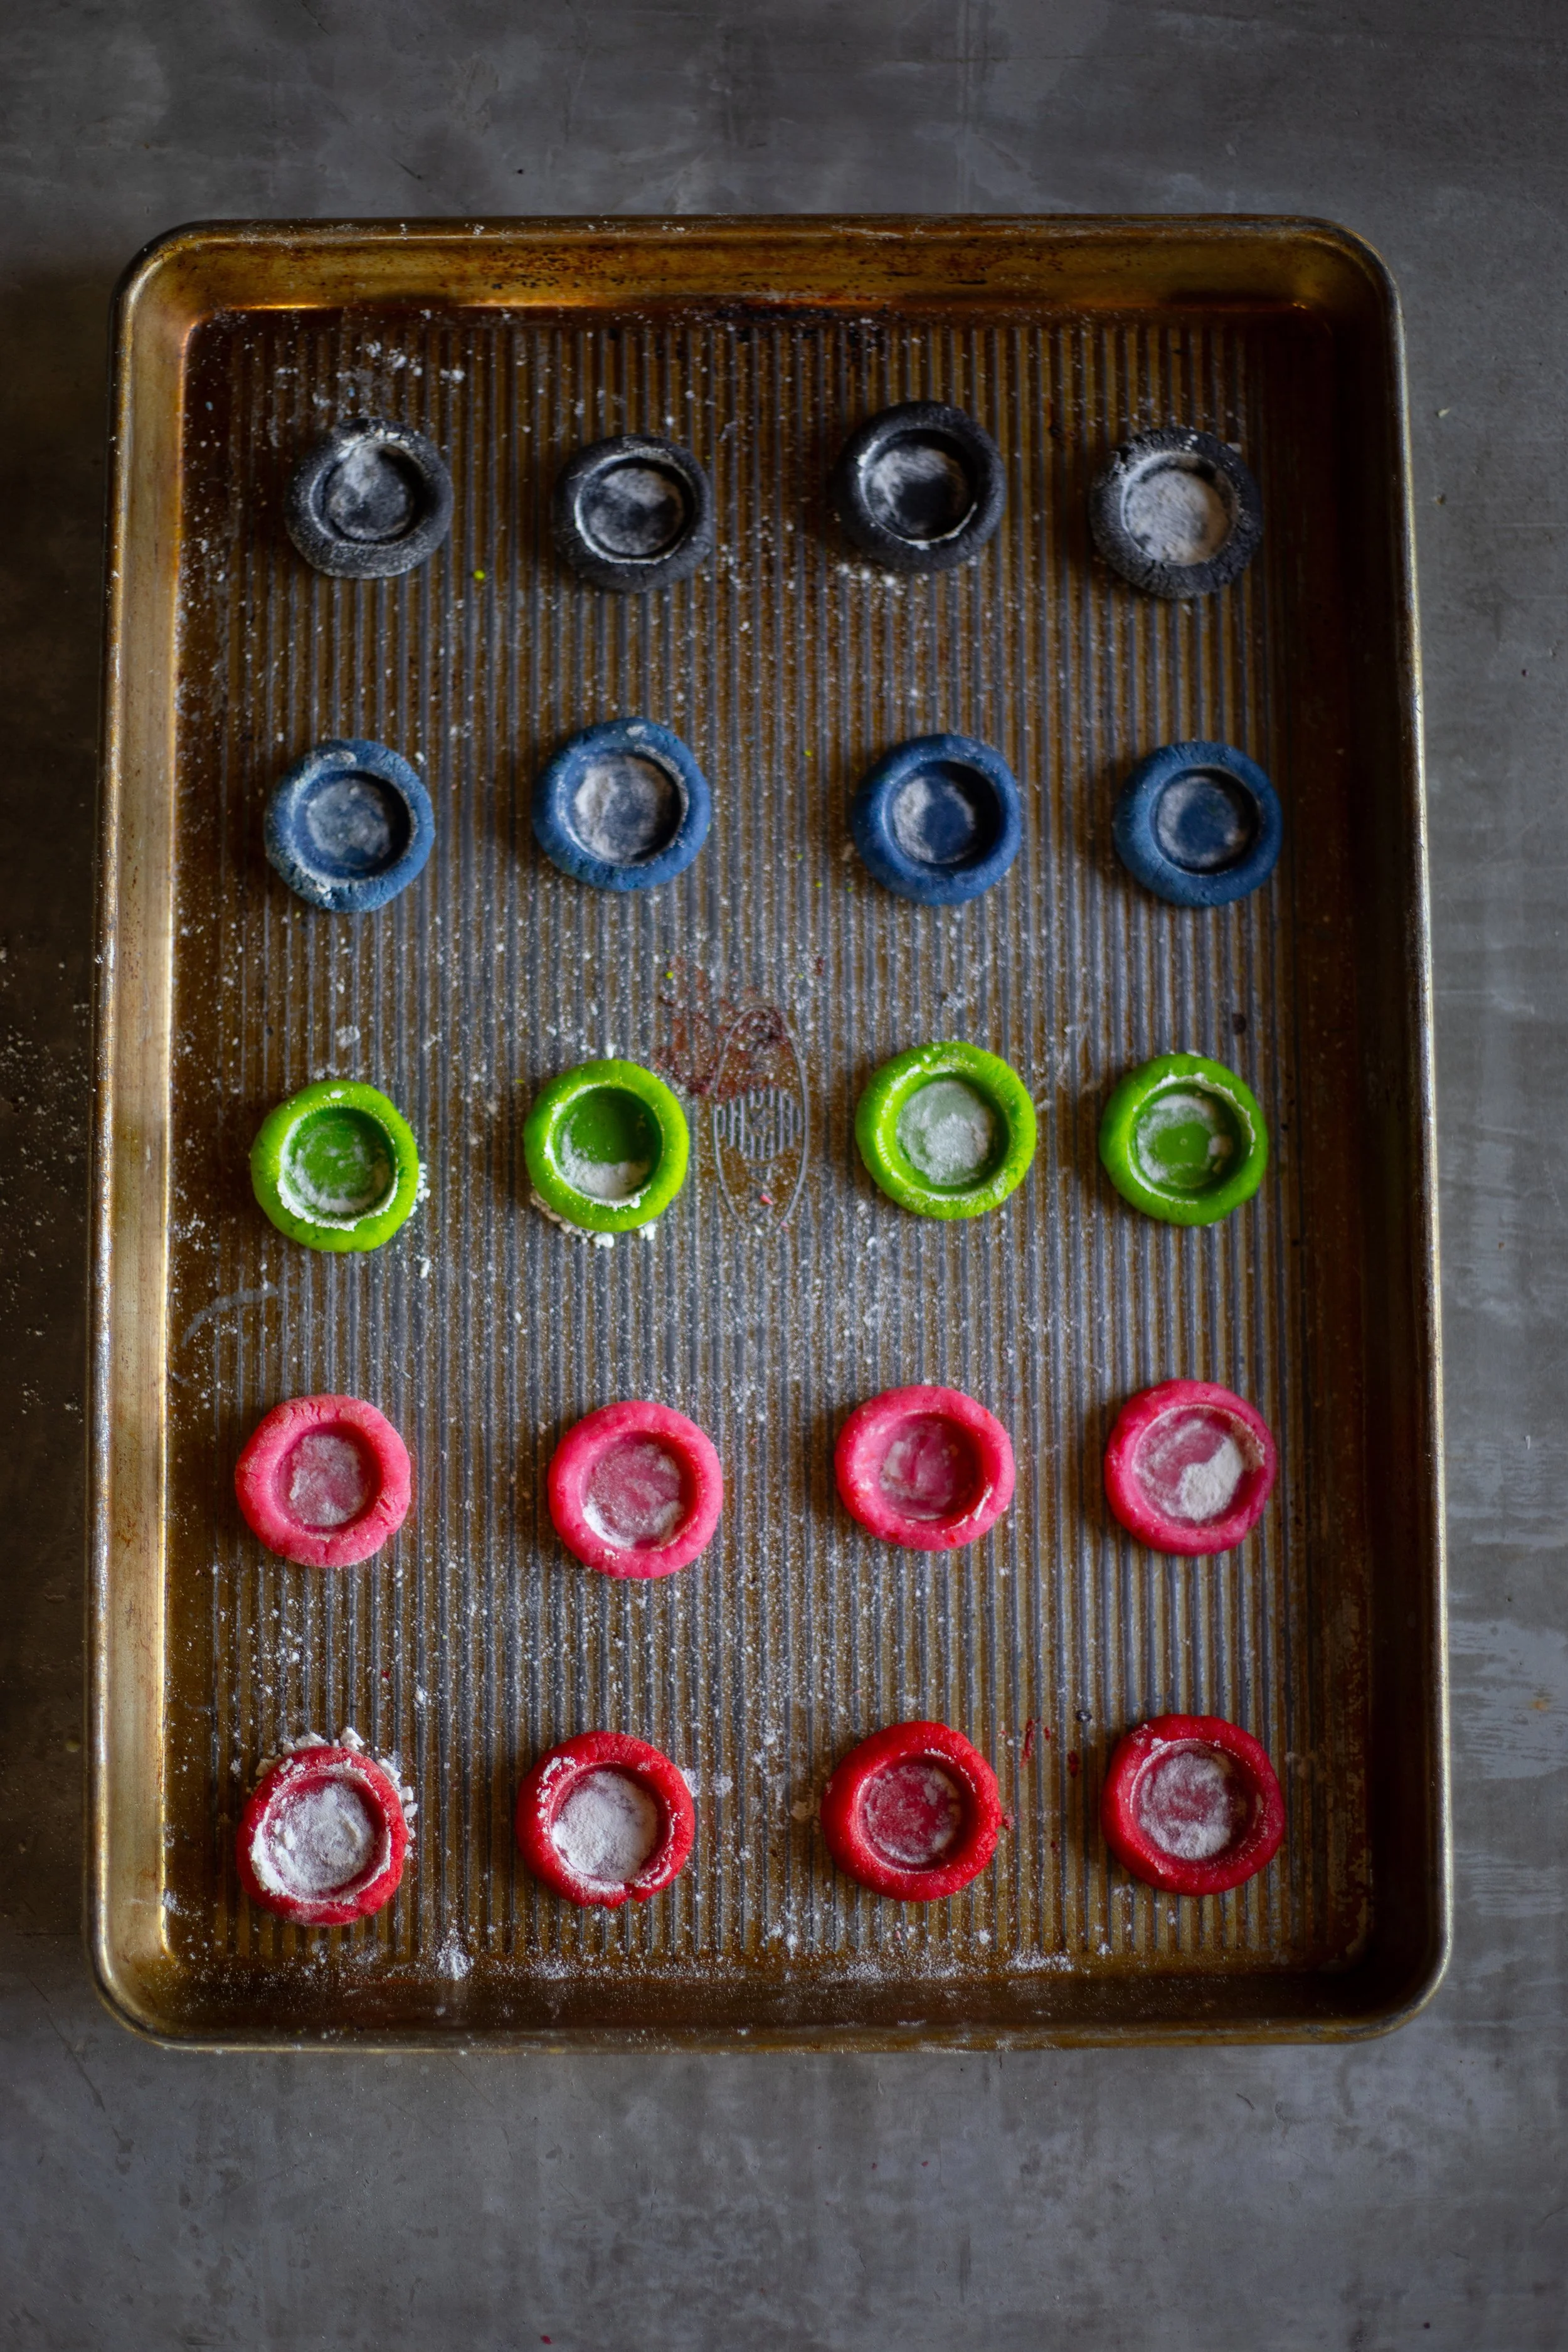
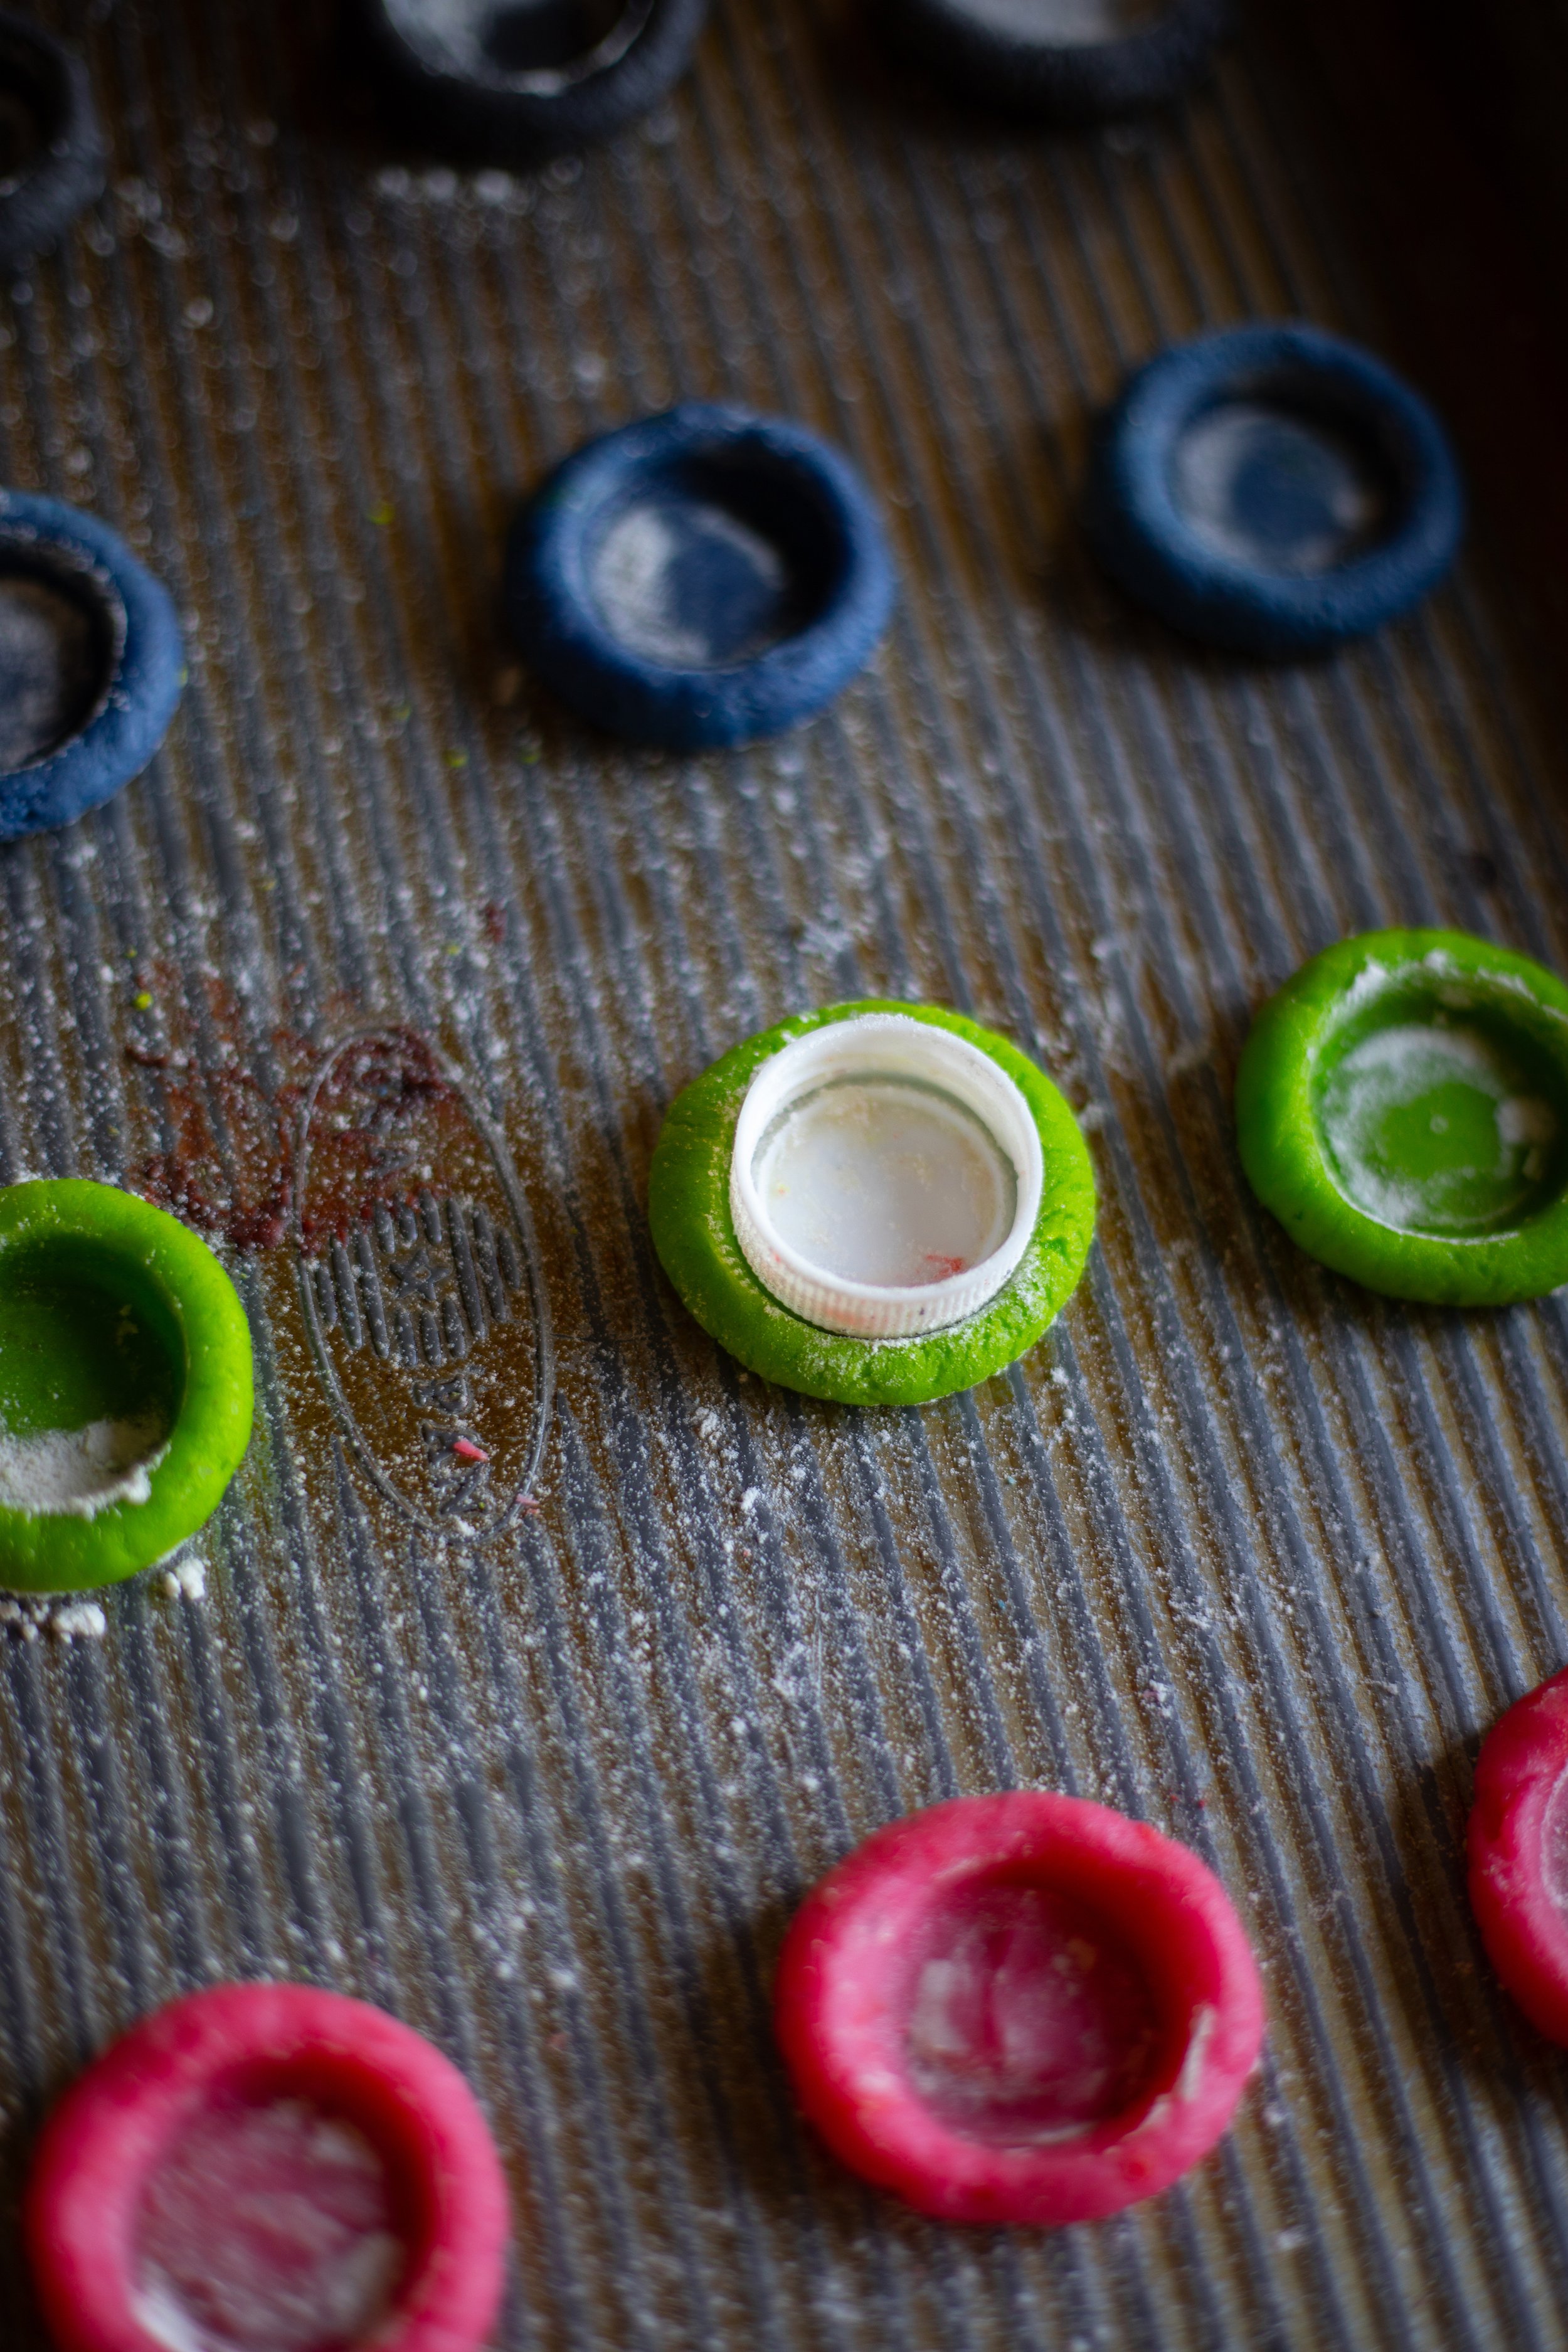
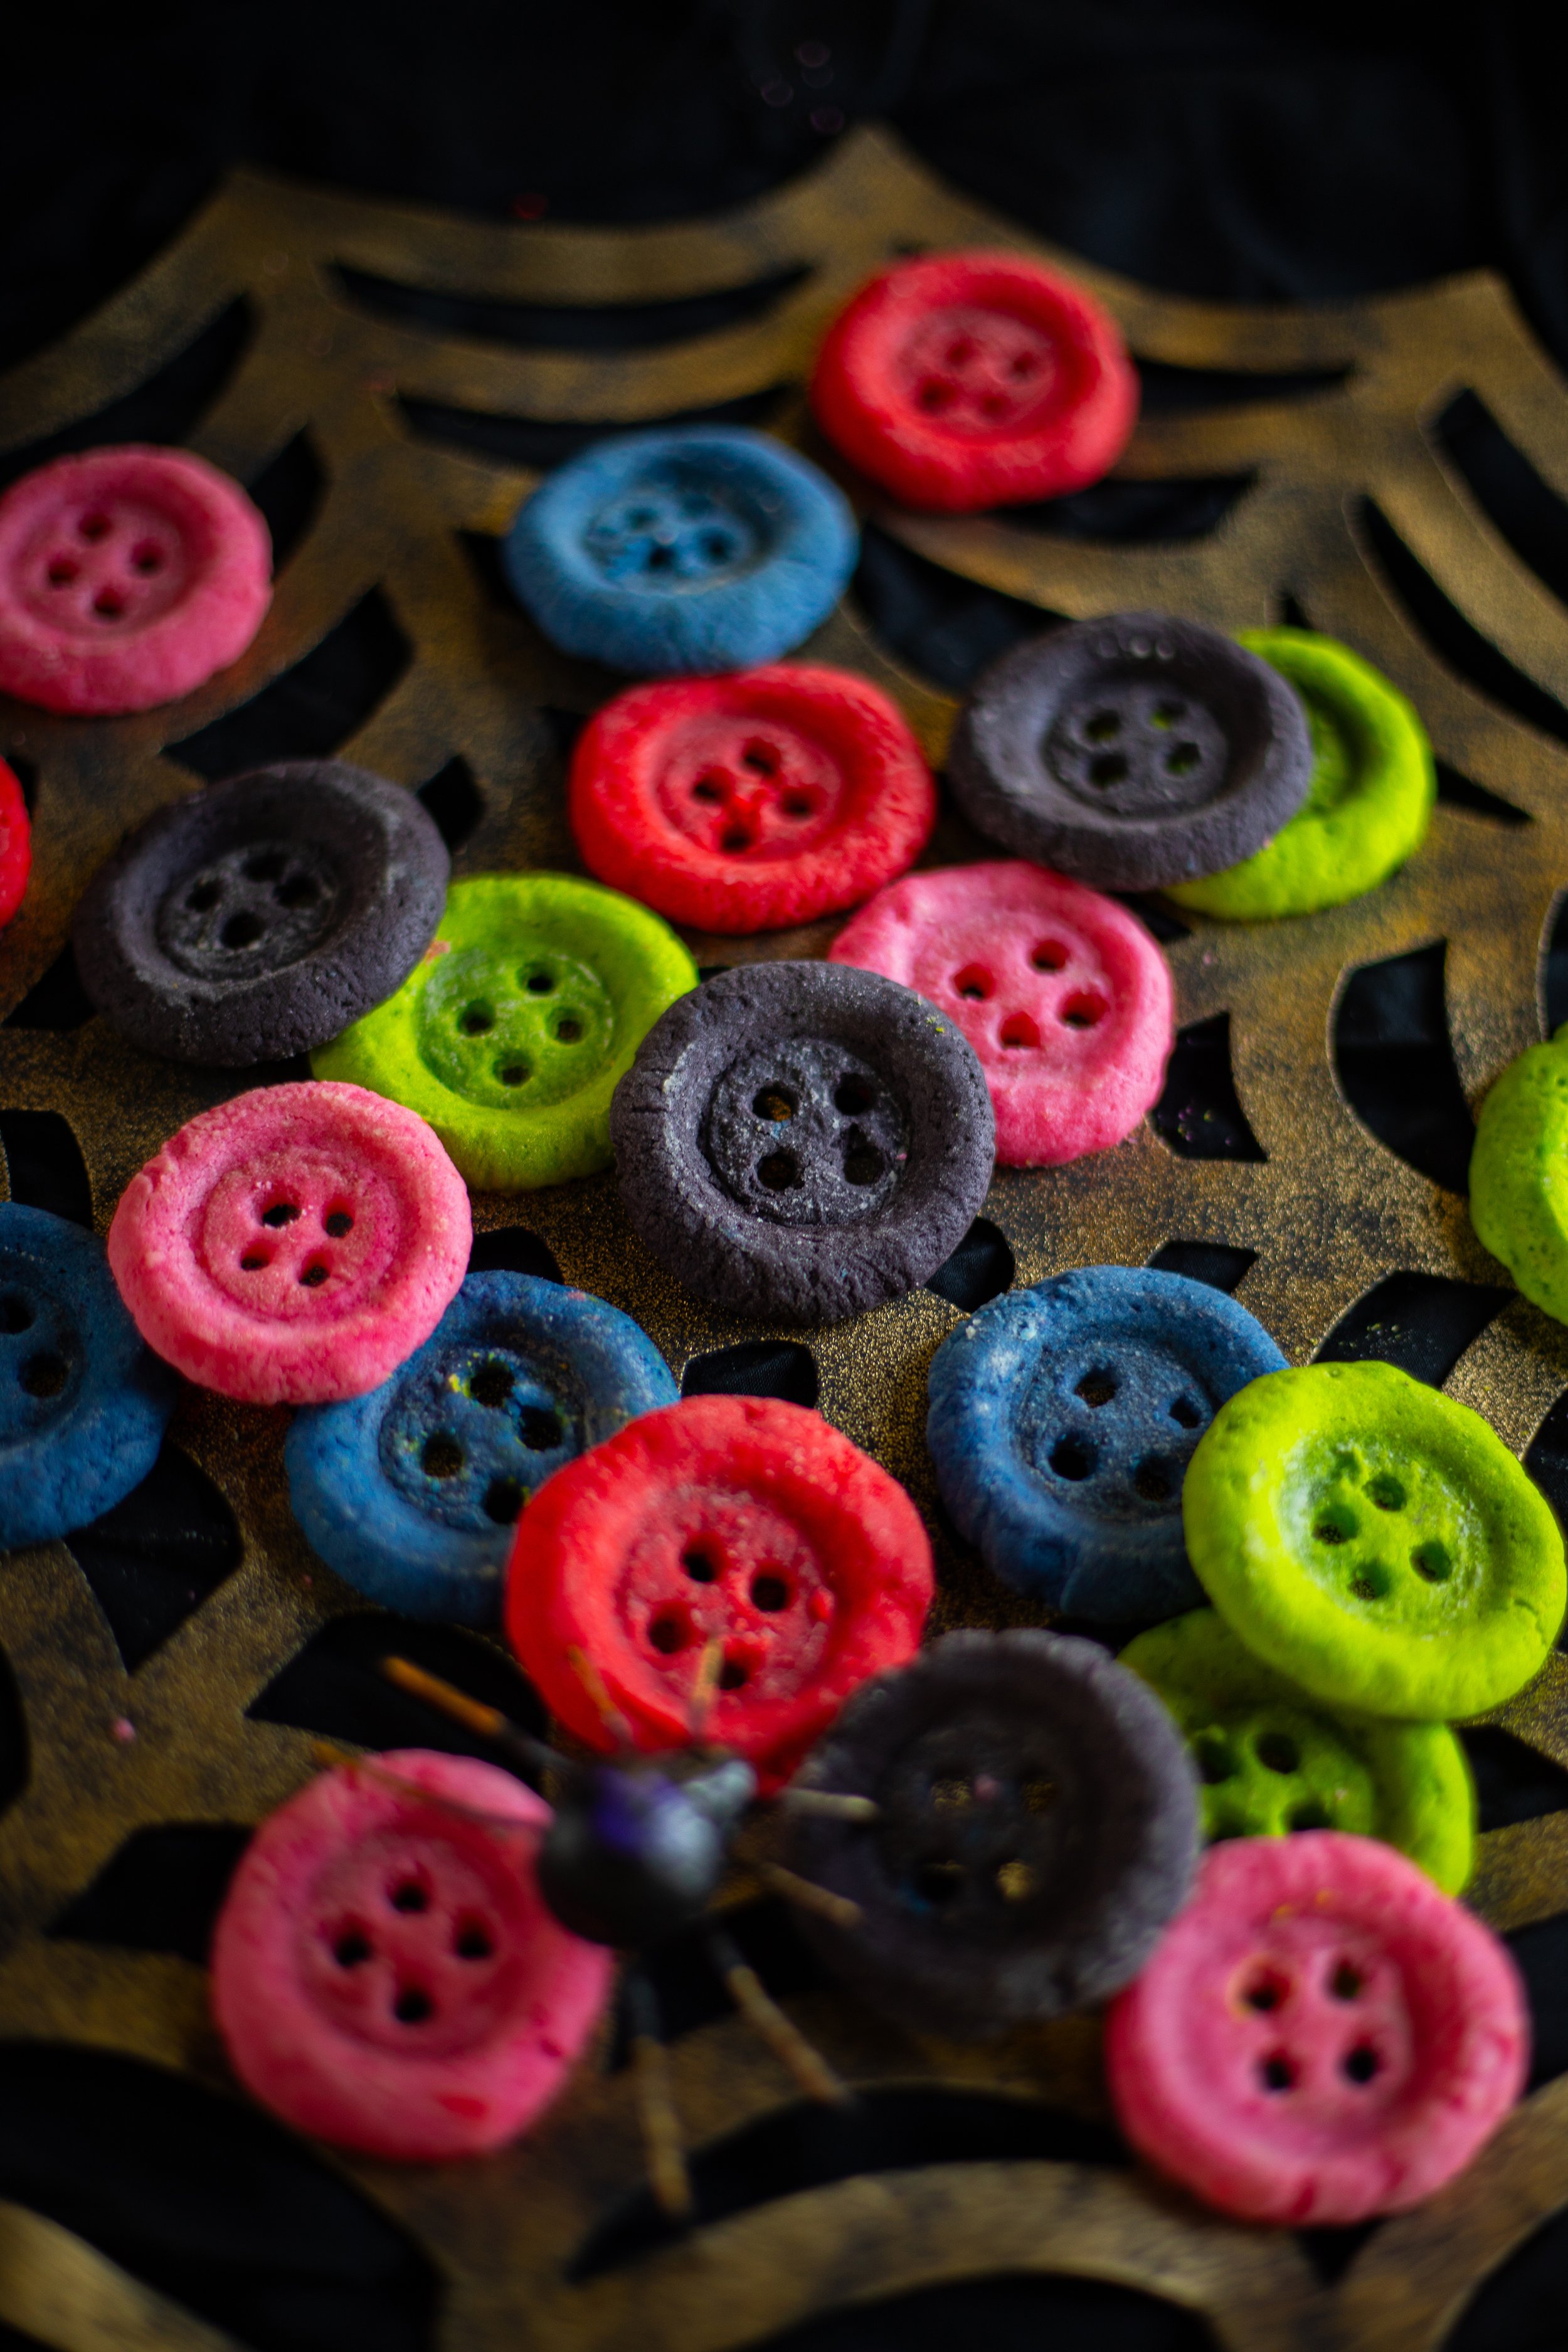
Step Four: Divide the dough into balls about 1 tablespoon (8 g) in size. Arrange the cookies about 2-inches (5-cm) apart on the baking sheets. With a plastic bottle cap (the kind from a soda bottle), press divots into the cookies, giving them the effect of a flat center and rounded edges. You will want to use a bit of extra flour to coat the bottle cap occasionally to prevent it from sticking to the cookies as this dough is very soft and sticky!

Step Five: With a standard sized plastic straw, cut holes into the flat part of the cookie to create button holes.
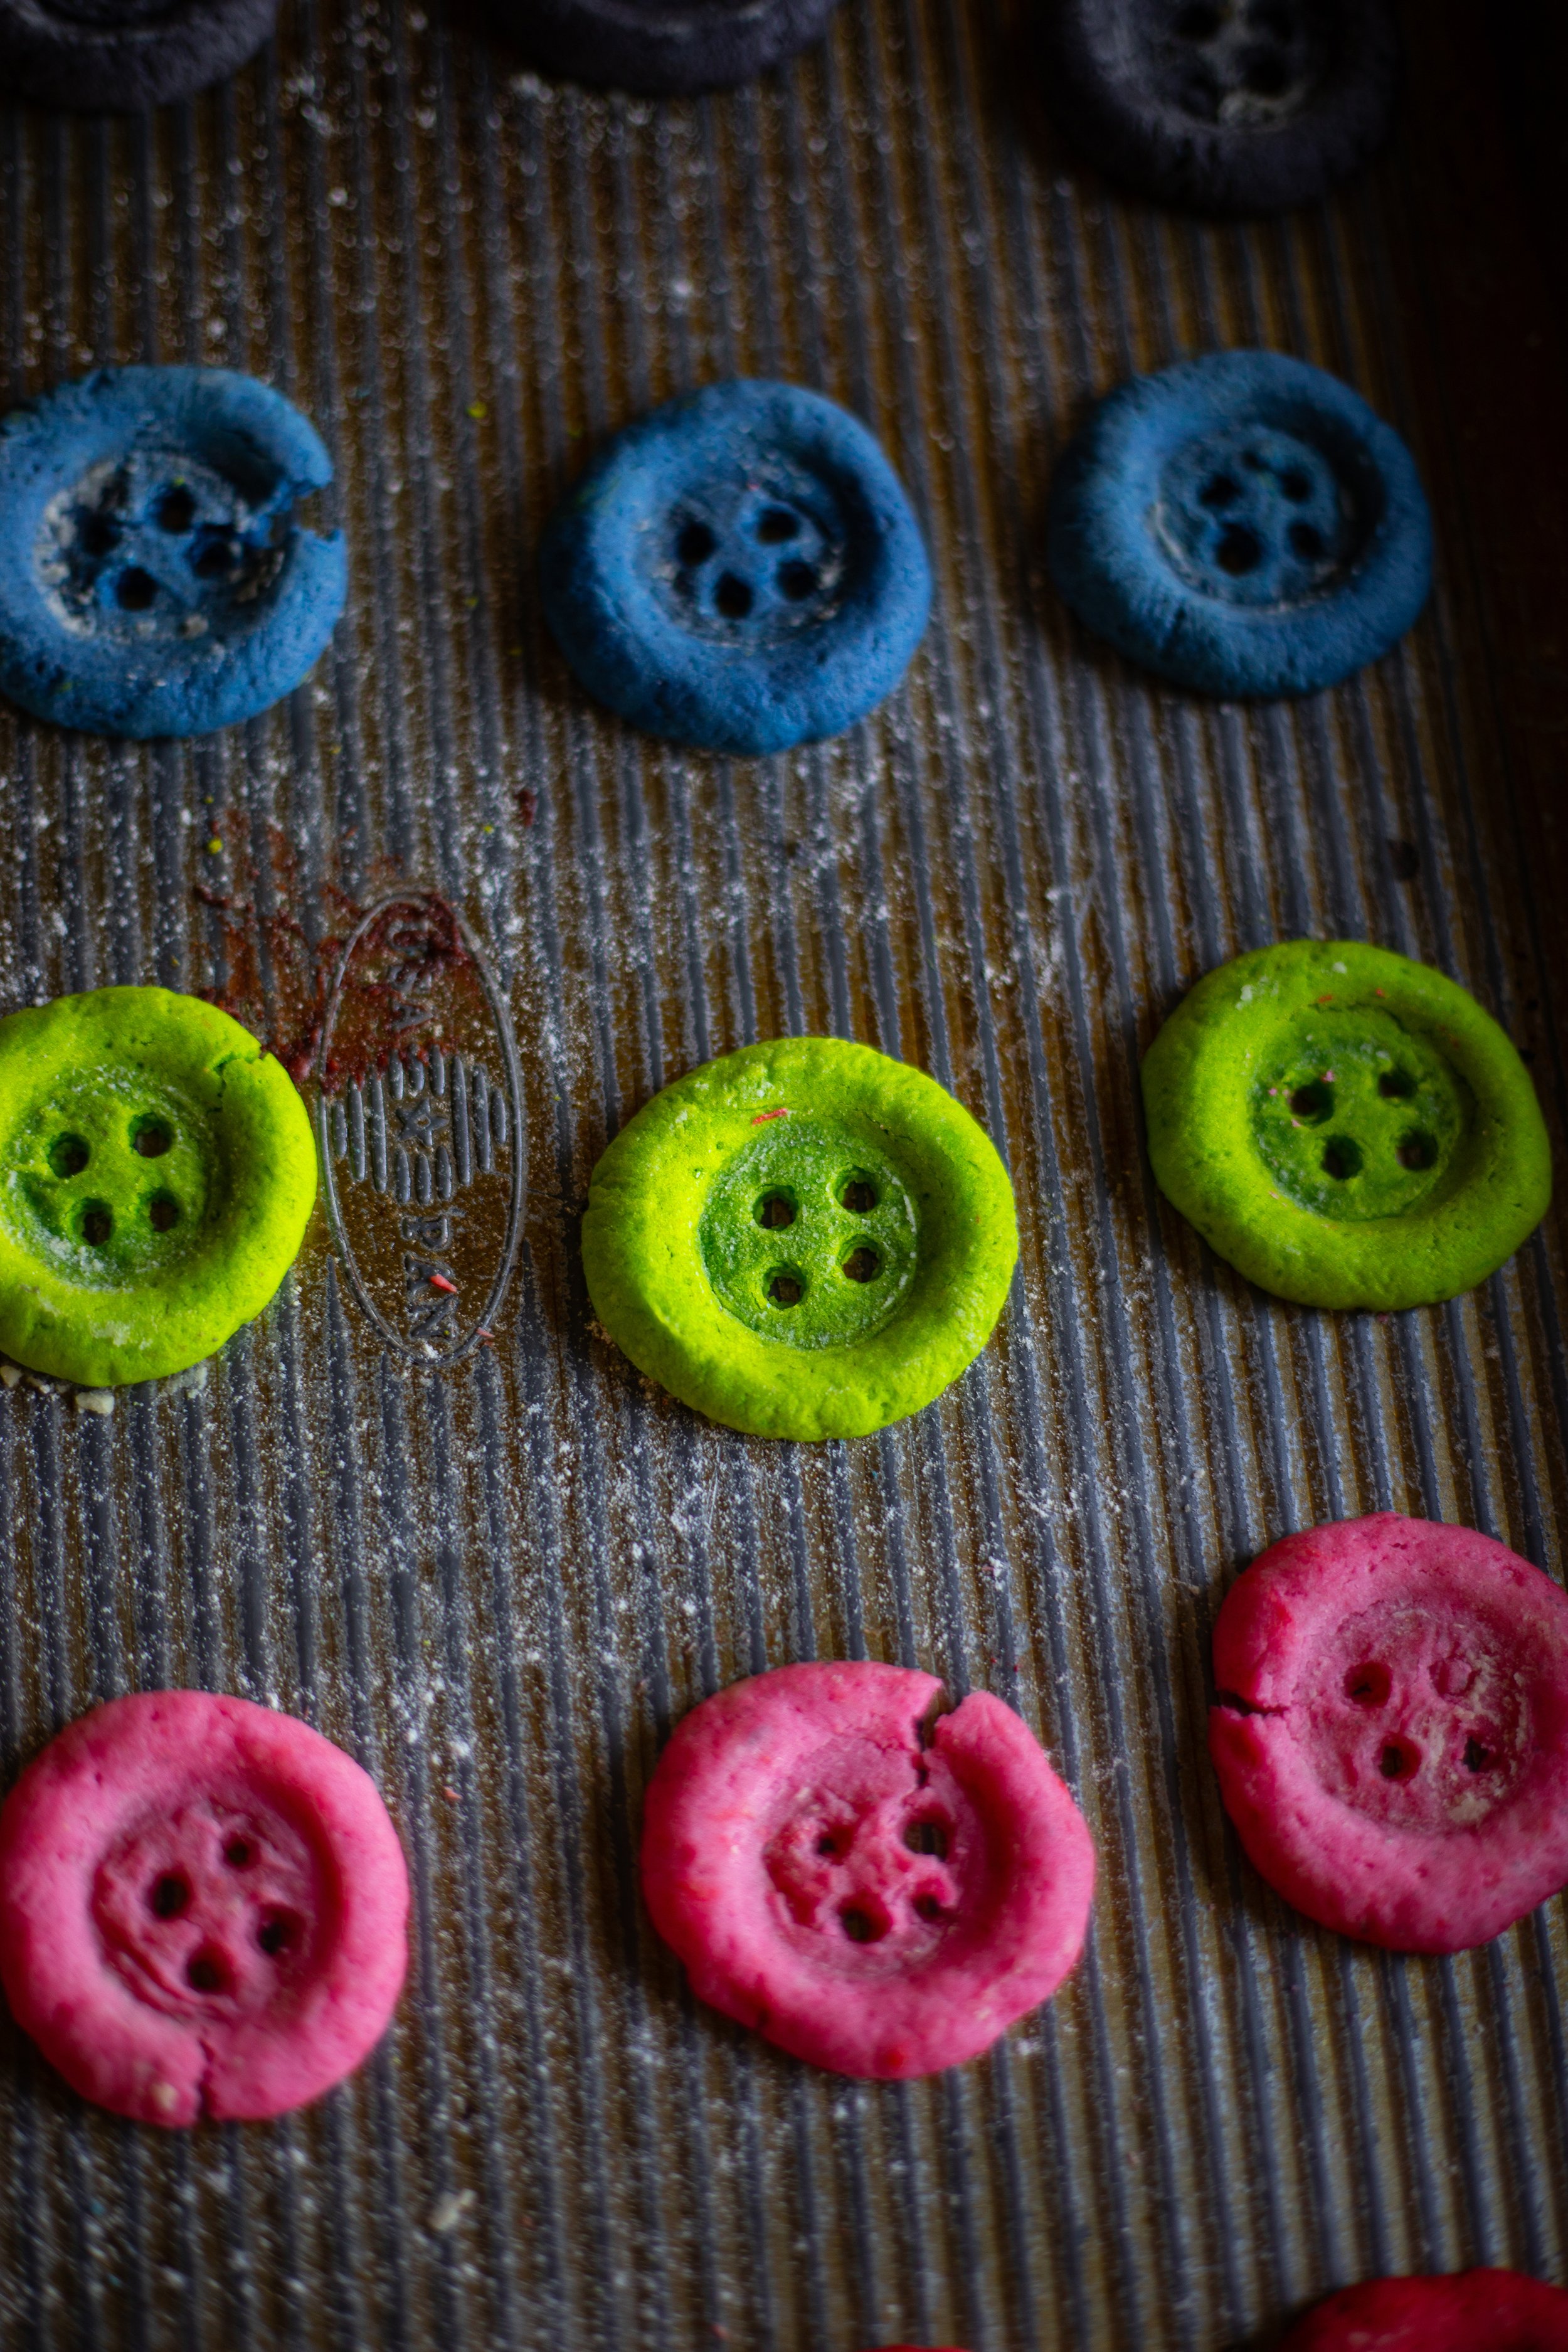
Step Six: Bake the cookies for 8 to 9 minutes or until the edges are set. Immediately after pulling the cookies from the oven, take the bottle cap and gently press into the divot again to re-flatten any parts that may have risen or puffed while baking. You can also re-cut the button holes with your straw for a clean edge. It's easier to bake the cookies one tray at a time for this reason.

Recipe Tips:
These cookies took a bit of experimentation to get them to retain their shape after baking! Here are my best tips for baking your Button Eye Butter Cookies so they turn out beautiful!
Weigh Your Ingredients and Dough. I test all of my recipes by weight, so I highly suggest weighing your ingredients! Everyone’s “cup of flour” is a different weight, so your final cookies may turn out more soft or crumbly than mine. You can also weigh your final cookie dough to evenly divide each color’s portion and bake the cookies at the correct size.
Button Shape. These cookies can be a difficult to maintain the iconic shape of the button, at least if you want them to look perfect! The best way to do this is to shape the cookie BEFORE baking by pressing down the center with a plastic bottle cap and cutting out the button holes with a straw. After baking, the cookies will expand and “puff up.” To fix this, immediately after pulling the tray from the oven, gently press down on the center of the cookie with the bottle cap again. You can choose to re-cut any of the button holes with the straw to give them a clean edge. If you wait to press down the center and cut the button holes AFTER baking, you can crack/break the cookie.
Color Formulas:
I wanted to create colored cookies that looked just like the button eyes in Coraline! The Other Mother offers options of button colors to Coraline during an iconic moment in the film, and there is various fan art with these uniquely colored eyes!
I used ChefMaster Gel Food Coloring to color the cookie dough. I prefer to use gel food coloring over water-based coloring because you do not need as much color, and it spreads and pigments the dough much better.
Here are my formulas for making the colored button cookies:
Black: 3 to 4 drops of Deep Black. This brand’s black color tends to lean a little purple/red, so I adjusted the color with drops of Leaf Green. Black can be difficult to develop, so it’s a good idea to let the dough rest for about an hour before adjusting the color.
Bubblegum Pink: 2 drops.
Vermilion: 4 drops Super Red + 2 drops Sunset Orange
Chartreuse: 4 drops Lemon Yellow + 1 drop Leaf Green
Coraline Blue: 4 drops Royal Blue + 4 drops Delphinium Blue + 1 drop Sky Blue + 1 drop Super Red
Final Thoughts:
With Halloween just around the corner, these Button Eye Butter Cookies are a must-have. Their spooky button design is a fun way to bring a touch of the Other World to your festivities. They’re also great for a themed Coraline party, whether you’re watching the movie, reading the book, or simply embracing a gothic-inspired dessert spread.
Similar Recipes:

Button Eye Butter Cookies from Coraline
Ingredients
- 1 cup (232 g) salted butter
- 2/3 cup (133 g) granulated sugar
- 2 large eggs
- 1 tsp vanilla extract
- 2 1/2 cups (325 g) all-purpose flour
- Gel food coloring; optional
Instructions
- In the bowl of an electric standing mixer fitted with a paddle attachment, cream together the butter and sugar until light and fluffy, about 3 to 4 minutes. Add in the eggs, one at a time, beating until well incorporated, about 2 to 3 minutes more. Then, beat in the vanilla.
- Stir in the flour, bringing the dough together until it is cohesive and soft and pulls away slightly from the sides of the bowl, another 2 to 3 minutes.
- Next, you will want to color the dough with food coloring to make the different buttons. Divide the dough into five equal sized portions.*
- Place the portions of dough into small bowls. I found that it is easier to fold the food coloring into the dough with a silicone spatula than in the standing mixer, as you can really spread the coloring fully. Add a few drops of food coloring into each portion to create black, vermilion (red-orange), chartreuse (yellow-green), pink, and blue. My color formulas are in the notes below!**
- Cover the bowls with plastic wrap and refrigerate the dough for at least 1 hour and up to 48 hours before baking.
- Preheat the oven to 350° F (177° C) and set aside 2 large baking sheets.
- Divide the dough into balls about 1 tablespoon (8 g) in size. Arrange the cookies about 2-inches (5-cm) apart on the baking sheets. With a plastic bottle cap (the kind from a soda bottle), press divots into the cookies, giving them the effect of a flat center and rounded edges. You will want to use a bit of extra flour to coat the bottle cap occasionally to prevent it from sticking to the cookies as this dough is very soft and sticky!
- With a standard sized plastic straw, cut holes into the flat part of the cookie to create button holes.***
- Bake the cookies for 8 to 9 minutes or until the edges are set. Immediately after pulling the cookies from the oven, take the bottle cap and gently press into the divot again to re-flatten any parts that may have risen or puffed while baking. You can also re-cut the button holes with your straw for a clean edge. It's easier to bake the cookies one tray at a time for this reason.
- Transfer the cookies to a wire cooling rack to finish cooling. Serve the cookies at room temperature. They will last in an airtight container at room temperature for about 5 to 6 days, or they can be frozen and enjoyed later. Simply thaw at room temperature before serving, about 1 hour.
Notes
*Weigh Your Dough. You may want to weigh the dough and divide accordingly so that you have equal amounts of each color. My dough weighed about 763 grams, so I divided it into portions that were about 152 grams each.
**Color Formulas:
***Button Holes. I experimented quite a bit with this recipe and found that it was best to cut out the little button holes BEFORE baking. This does cause the holes to expand a bit, so they don't look perfectly cut. Immediately after baking, you can re-cut the button holes with the straw to create a clean edge. I found that if I waited to cut the button holes AFTER baking, the cookies would tend to crack in half.
Nutrition Facts
Calories
72Nutritional information is only an estimate. The accuracy of the nutritional information for any recipe on this site is not guaranteed.